Getting Started
Installation
To install promptmage, run the following command:
Annotated Code Example
Here is an example of how to use promptmage in your application:
from promptmage import PromptMage, Prompt, MageResult

# Create a new promptmage instance
mage = PromptMage(#(1)!
    name="example",#(2)!
)
- The
PromptMageclass is the main class of promptmage. It is used store all the information about the flow and to run the flow. - The
nameparameter is used to give the promptmage instance a unique name. This allows to run multiple promptmage instances in parallel.
Steps are the building blocks of a flow. They are used to define the different parts of the flow and to connect them together. A step is just a python function with the @mage.step() decorator which returns a MageResult. Here is an example of how to create a step:
@mage.step(
    name="step1", #(1)!
    prompt_name="prompt1", #(2)!
    initial=True #(3)!
)
def step1(question: str, prompt: Prompt) -> MageResult: #(4)!
    response = client.chat.completions.create( #(5)!
        model="gpt-4o-mini",
        messages=[
            {"role": "system", "content": prompt.system},
            {
                "role": "user",
                "content": prompt.user.format(question=question),
            },
        ],
    )
    answer = response.choices[0].message.content
    return MageResult(
        next_step=None, #(6)!
        result=answer
    )
- The
nameparameter is used to give the step a unique name. - The
prompt_nameparameter is used to specify the name of the prompt that should be used for this step. - The
initialparameter is used to specify if this is the initial step of the flow. - The
step1function is a step that takes a question and a prompt as input and returns aMageResultwith the result of the step and the name of the next step to run. The prompt is managed by the promptmage instance and is automatically passed to the step. - The step uses the OpenAI API to generate a response to the question using the prompt.
- The
next_stepparameter is used to specify the name of the next step to run. IfNoneis returned, the flow will stop.
Usage
Put the above code in a file called flow.py and setup the OpenAI client. To run the flow with promptmage, run the following command:
This will start the promptmage server and run the flow at the given path. You can now access the promptmage interface at http://localhost:8000/gui/.
Usage with a remote backend server
For a production setup and collaborative usage with teams you can run the promptmage server with a remote backend. To run the remote backend on a remote server, run the following command:
To connect your promptmage script to the remote backend, you need to add the remote url to the PromptMage instance of your script:
Now you can run your script and the promptmage server will use the remote backend to run the flow and store the results.
- The
remoteparameter is used to specify the URL of the remote backend to use. If this is set, thePromptMageinstance will use the remote backend instead of the local one.
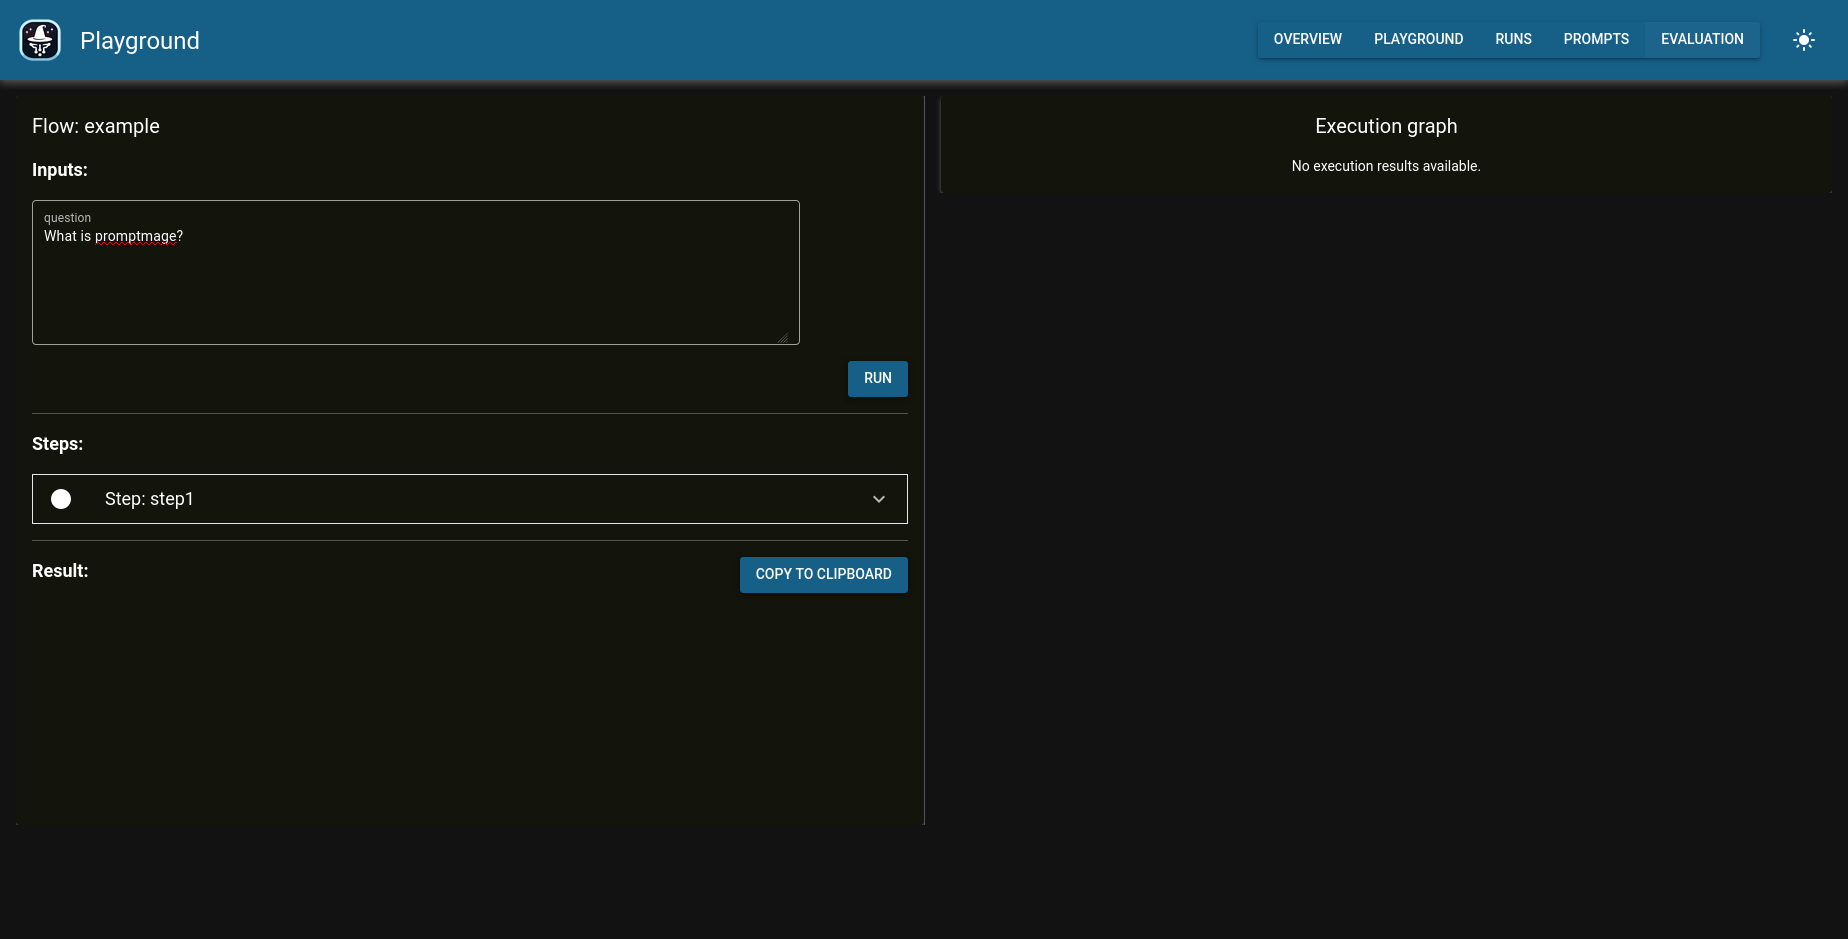
GUI walkthrough
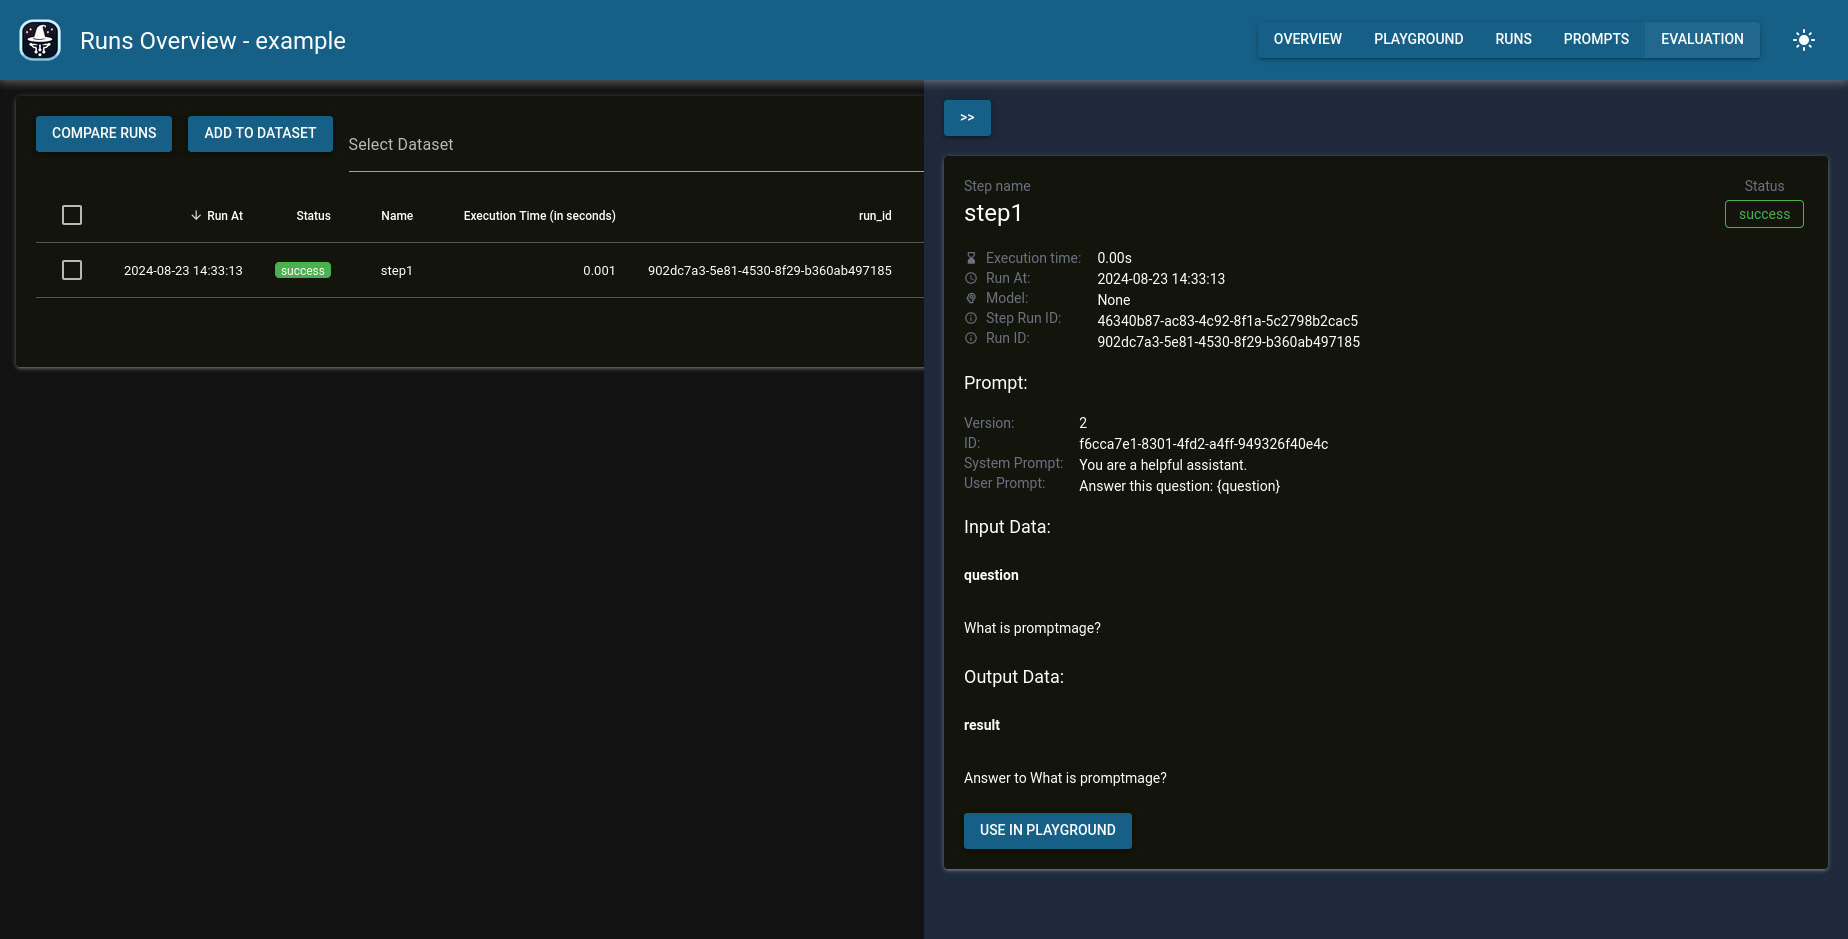
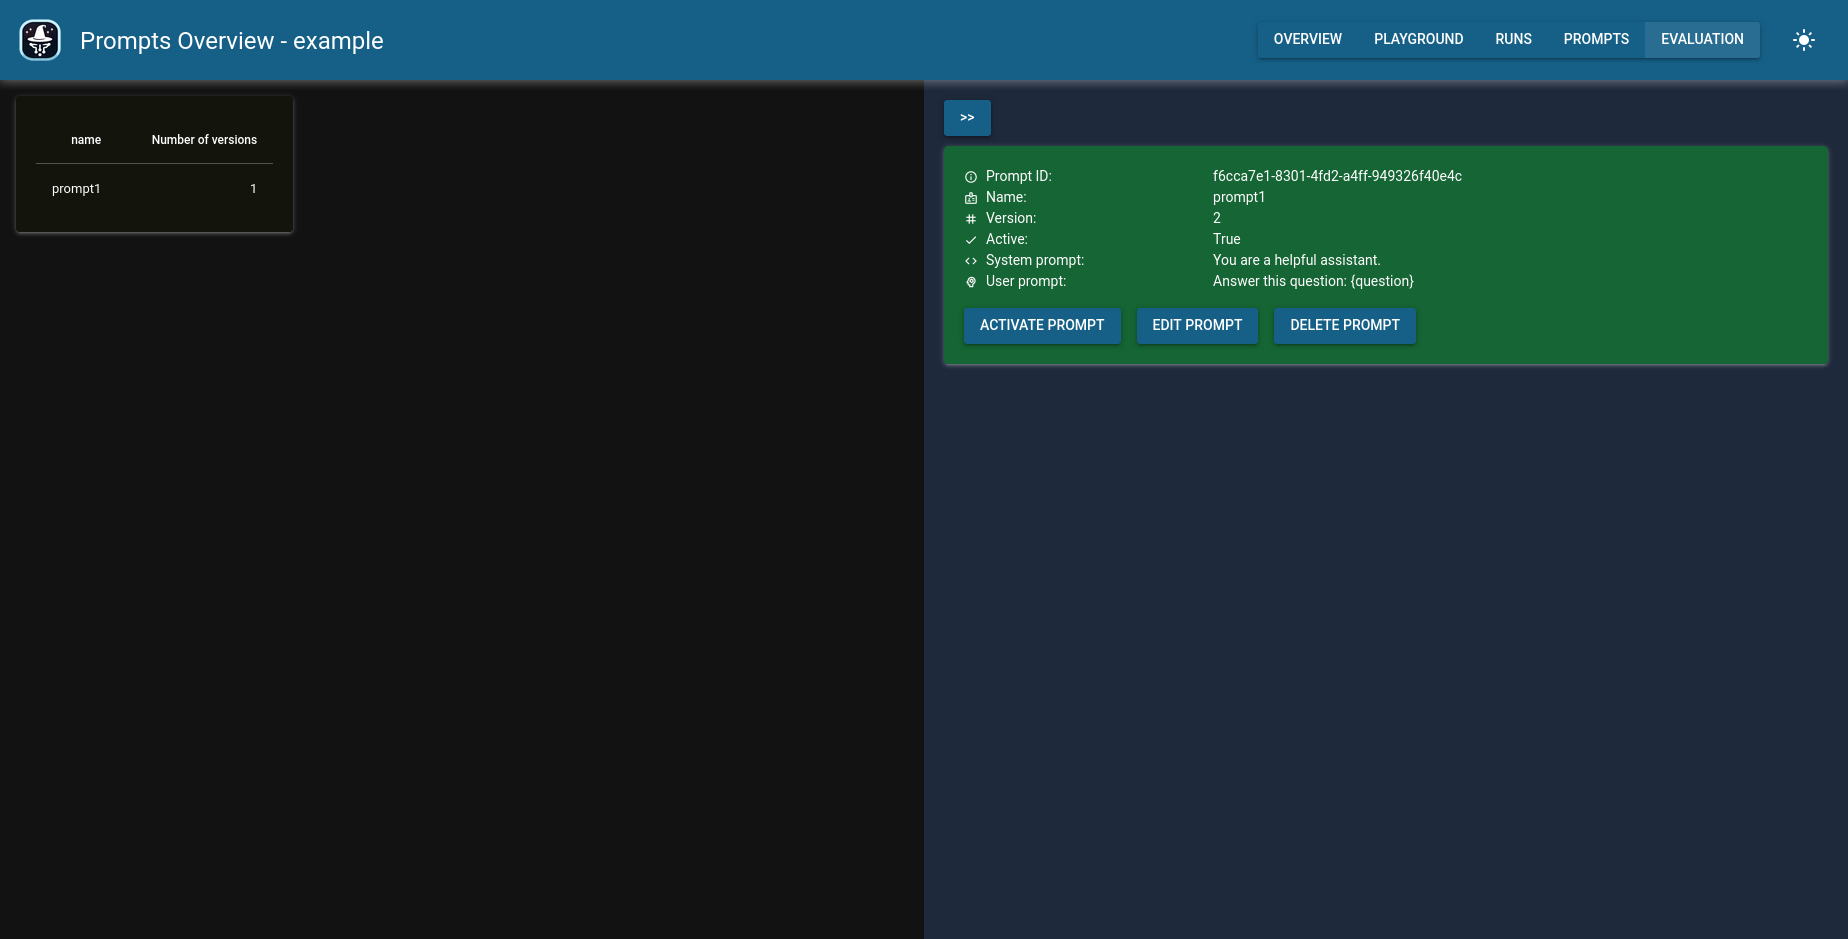
The promptmage interface is divided into four main sections: the flow playground, the run history, the prompt repository, and the evaluation section.
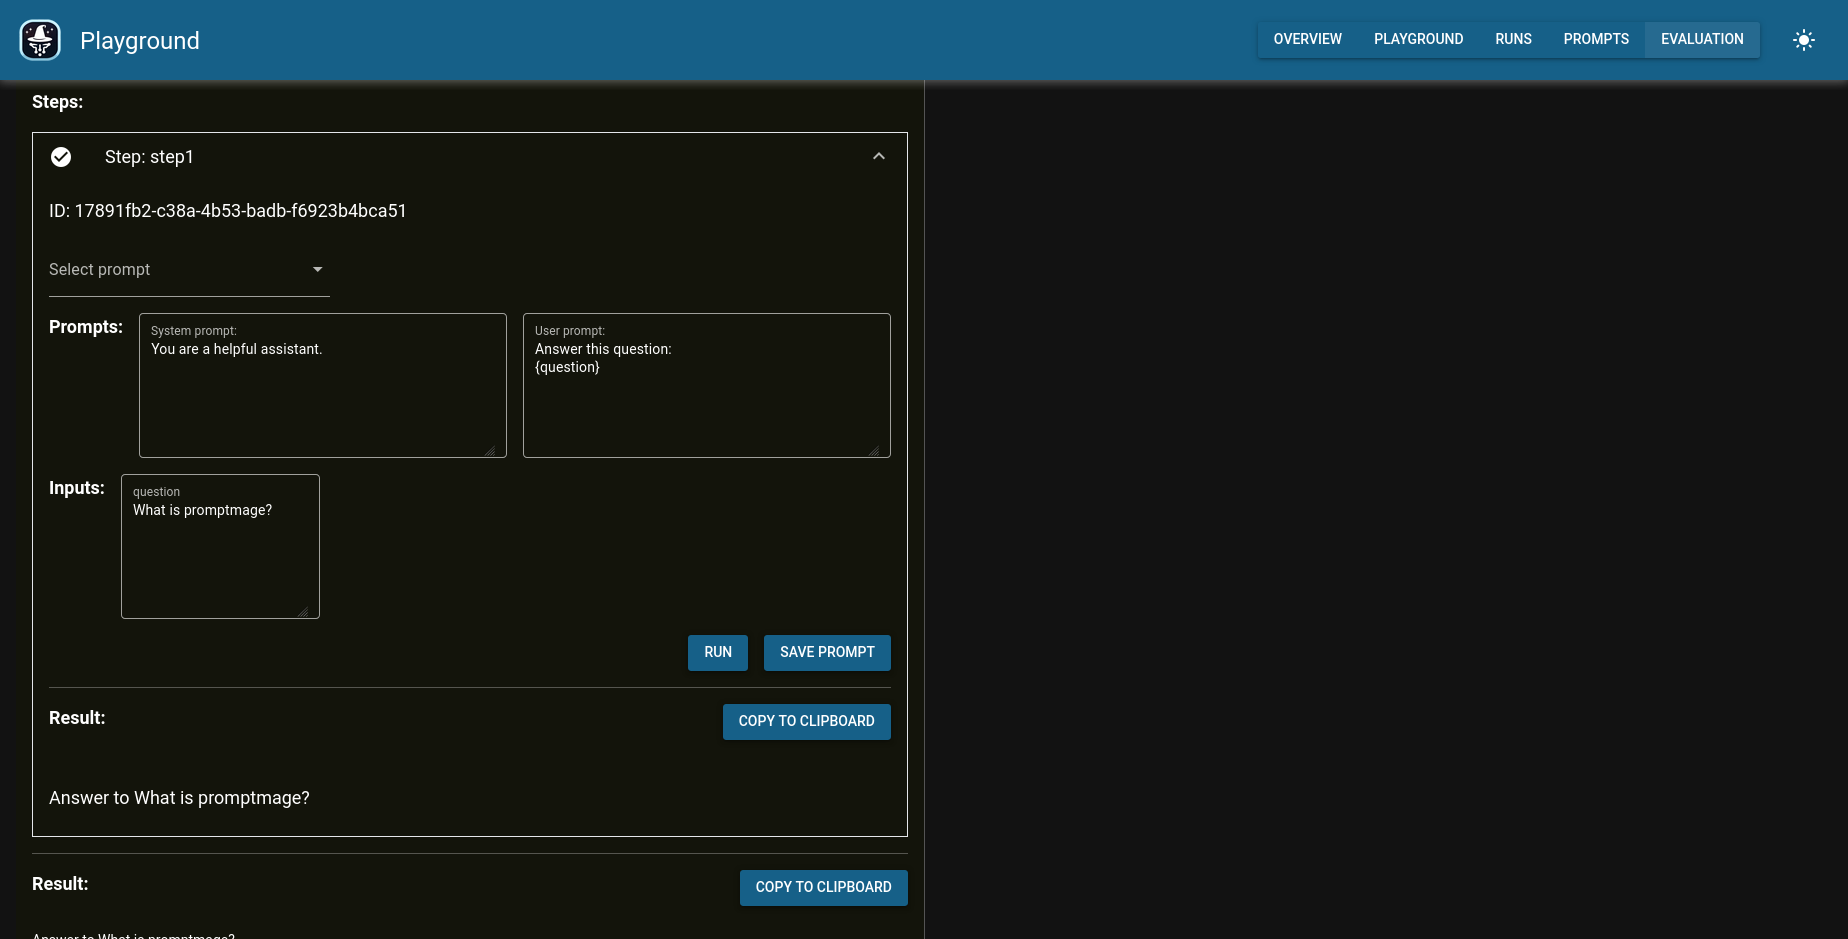
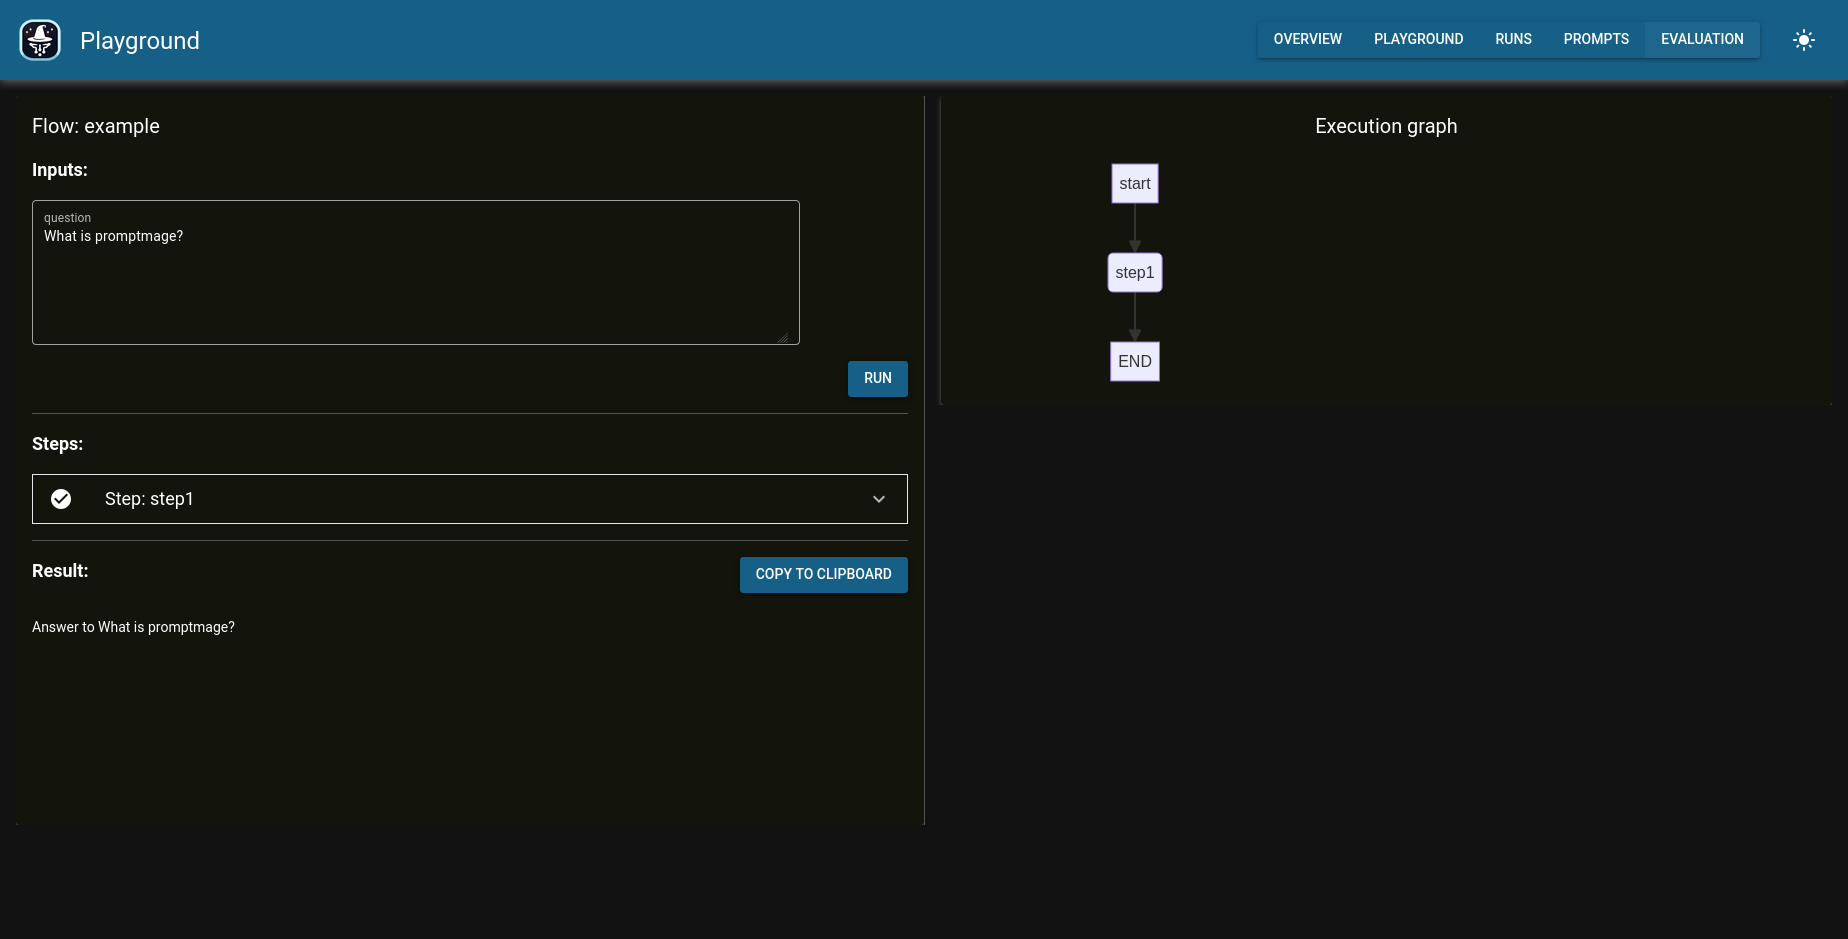
Flow playground
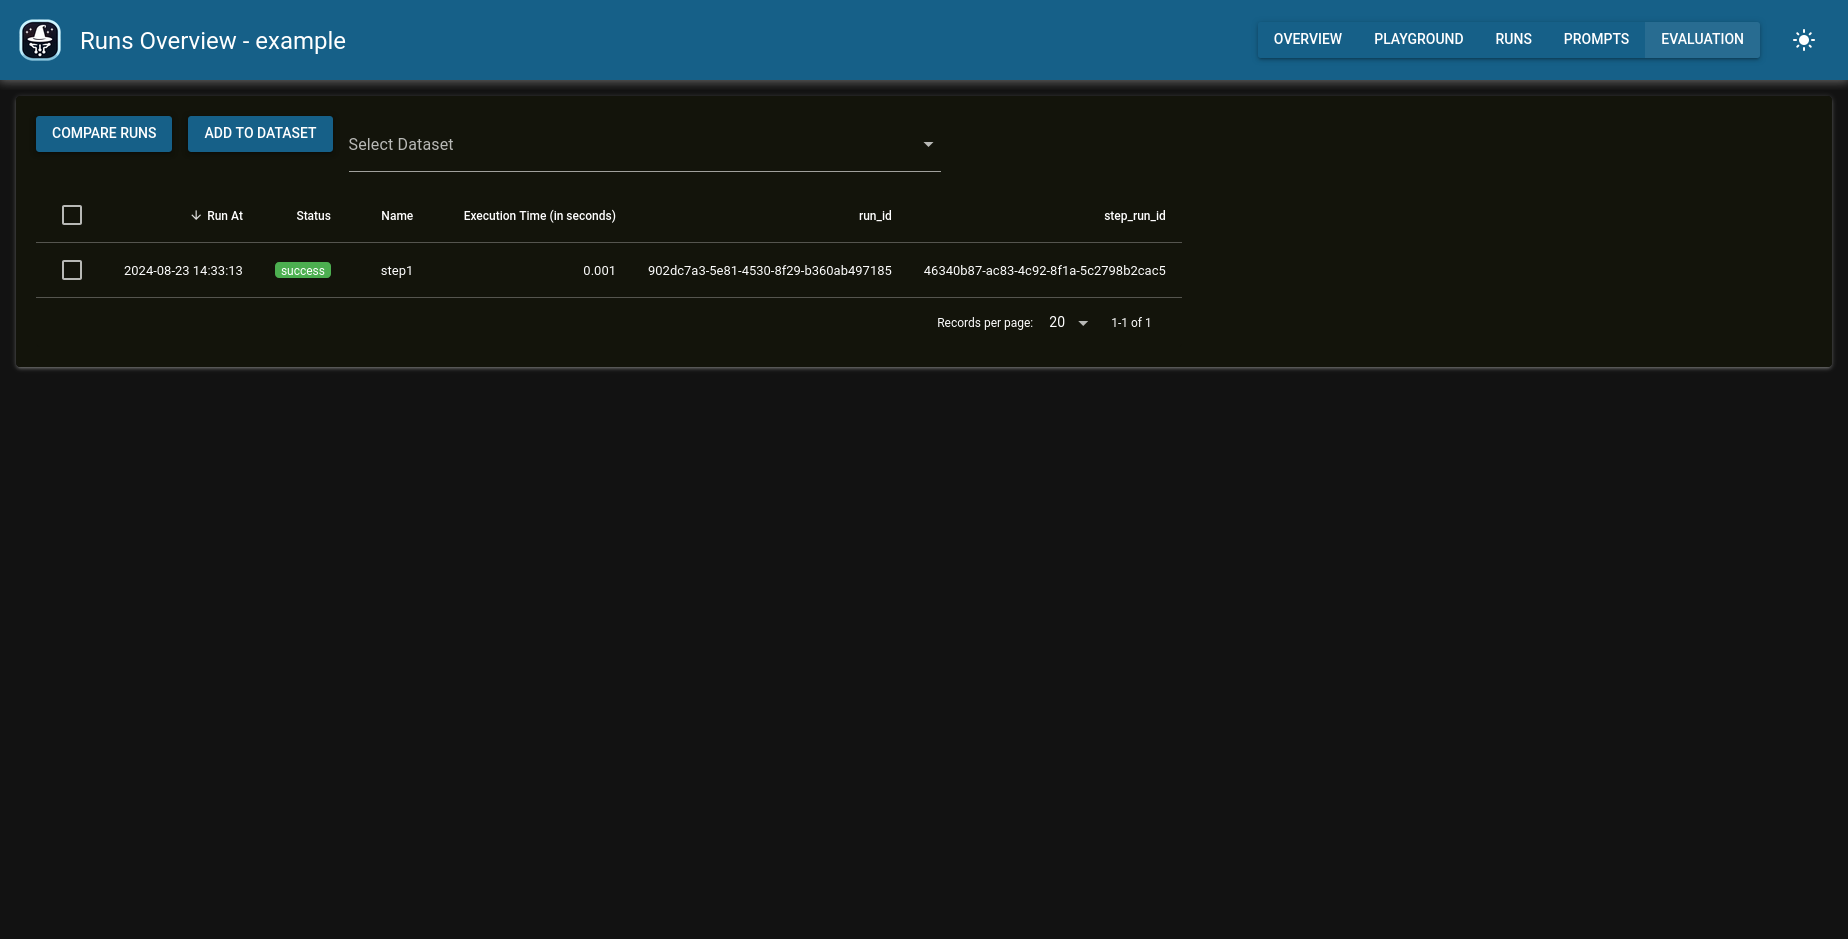
Run history
Prompt repository
More examples
Have a look at the examples in the examples folder to see how to use promptmage in your application or workflow.
Use with Docker
You can find an usage example with docker here: Docker example.